How to Make Money on YouTube as a Kid

“What do you want to be when you grow up?”

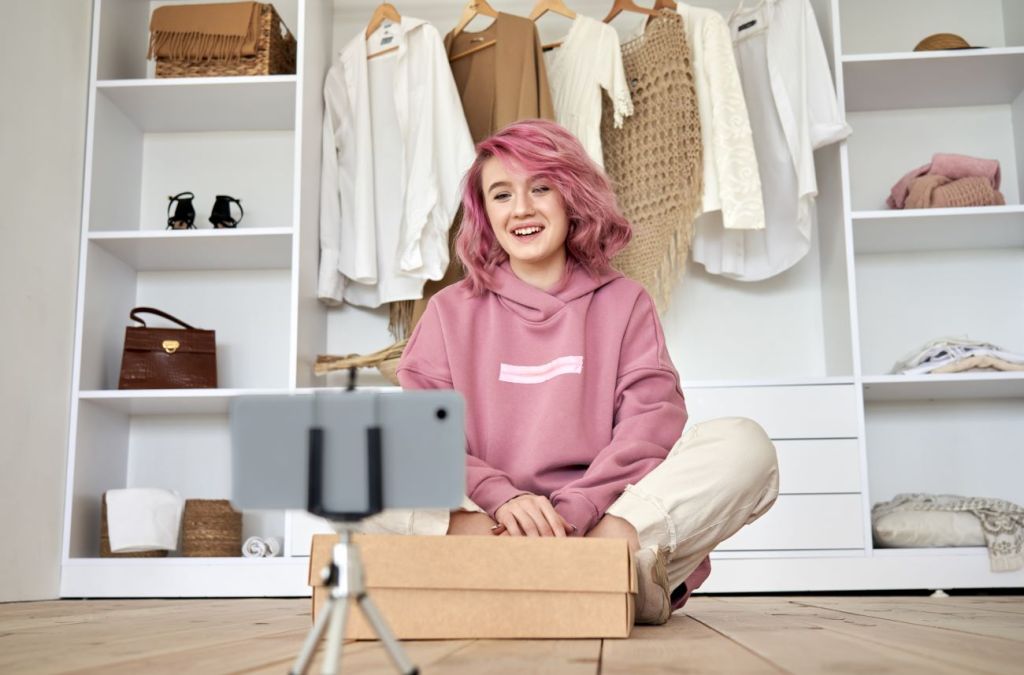
For many parents, the answer was probably “a teacher” or “an astronaut.” Fast forward to today and an overwhelming number of kids might say “professional YouTuber” as their future career of choice. A survey of 3,000 kids aged 5-12 in the U.S., U.K and China revealed that 18-30 per cent of kids would rather be a vlogger than conquer space. Making money on YouTube as a kid has officially hit the mainstream.

With an estimated 80 per cent of kids under 11 on YouTube, this should be no surprise. As humans, our brains are wired to want to be what we can see, and with many successful YouTubers under age 25, it’s natural for kids and teens to want to emulate that success. Seeing peers constantly unboxing the newest toys, makeup and video games, or creating communities with hundreds—even thousands—of adoring fans can be tough to resist.

Here’s how kids and teens can make money on YouTube. 

Kids are already influencers on YouTube

While some kids—like YouTube sensation Ryan Kaji—rise to superstardom and unfathomable wealth, recent regulatory changes have impacted how creators can earn revenue on content made for or by kids. New restrictions around advertising on children’s video content first rolled out on the platform in 2020 and are about to get stricter as creators have found new ways to monetize despite these rules. 

The latest changes will be tougher on those who promote content that YouTube deems “overly commercial… such as videos that only focus on product packaging or directly encourage children to spend money.” If YouTube feels your videos offer “high-quality content,” they’ll boost your creator content in their algorithm, where “low quality” videos will be deprioritized and deliver fewer ads. With new parental controls added to the ecosystem in 2022, kid creators or creators of “for kids” content have to work very hard to get their work seen on the platform. 

Still, there are many ways for kids and teens to get creative and use YouTube’s two billion user base as a launchpad for entrepreneurial ideas they may have. The wonderful thing about YouTube is how anyone with a passion for a topic can build an audience and community around sharing what they love. This article will cover what’s possible for kids and teens to make money on YouTube and beyond the platform as they grow a loyal audience.

A young kid making money on YouTube by vlogging

How much money can kids and teens make on YouTube?

Kid YouTubers on average make on average $5 per every thousand views through ads. And, it’s estimated the average Canadian YouTuber earns approximately $54,000 per year, with many vloggers earning a few hundred dollars a month. A kid YouTuber will need 1,000 subscribers and 4,000 hours of “watch time” before turning on  AdSense, Google’s advertising platform, and start earning ad revenue. (Digital ads range from $1 to $18 per thousand ads viewed, depending on your content quality and reach.) 

And kids and teens should be aware that YouTube takes 45 per cent of their revenue from ads, but if they made a viral video that was watched half a million times, they’d receive $1,125 after YouTube takes its share. So, if your kid has the whole summer off, there’s time to play to see if you can hit it big and make money online as a kid

Anyone who has edited videos knows it takes a lot of time and patience, especially if you’re striving to create high quality videos.

It’s important to note the amount of time and effort YouTubers put into their channels. To keep growing your audience, it takes consistency of posting, as well as community building. Many YouTubers and social media influencers experience burnout and other mental health challenges from what feels like a relentless need to ideate, create, post and respond to content demands. Parents should be aware of the ins and outs of YouTube as a platform for kids before signing off on allowing your child to create their own channel for broadcasting.

How much do the most popular kid YouTubers make?

Lily Singh

Perhaps the most popular Canadian YouTuber, Lilly Singh, started her YouTube channel at 16. With 14.7 million subscribers, Singh parlayed her eventual fame into a late-night talk show on American TV, has an upcoming book entitled Be a Triangle, and has an estimated net worth of USD 20 million. 

Christine Rotenberg

While not a minor, Ottawa-based Cristine Rotenberg started Simply Nailogical while still in school. Her now-famous nail polish channel has over seven million subscribers, and Rotenberg is estimated to earn anywhere from USD 179,000 to USD 2.9 million.

Luke Davidson

Luke Davidson was a teen when he started making comedy, opinion and facts videos on YouTube. Now with over seven million subscribers and four YouTube channels, it’s estimated that Davidson makes anywhere from USD 60,000 to over 400,000 per month

Ryan Kaji

With 32.6 million subscribers, Ryan Kaji of Ryan’s World has a reported net worth of USD 100 million and earned more than USD 25 million in 2020 alone. He parlayed his success into an Amazon show and his own product line, making him the highest-paid YouTuber in the world. 

Can You Make Money on YouTube if You Are Under 18?

The short answer? Yes! YouTube guidelines for monetizing your channel as a minor are strict. However, with parental consent, a bit of creativity and a lot of hard work, kids under 18 can still become influencers and use the platform to make money, growing their brand and audience so they can earn revenue through other channels where fans can support them. Make sure you’re creating content that you love so that you can connect with a global audience you would like to cultivate a community around. It will be challenging to stay true to your authentic self when pursuing a vlogging career solely to make money.

According to YouTube guidelines, the minimum age requirement to participate in their AdSense program is 18 years. However, if a minor’s YouTube account links to an approved AdSense account (of a parent or guardian over 18), they can start using advertising as a source of income. (More on how to work together as parent and child to set up AdSense below.)

Parents can help set up a YouTube channel for kids while advising them on how to create compelling content that follows YouTube guidelines.

Can you make money on YouTube Shorts?

What are YouTube Shorts?

YouTube Shorts is a new short-form video experience that was launched by YouTube in 2020. Shorts allows users to create and watch vertical videos that are up to 60 seconds in length, with a variety of music and creative tools available to enhance the content. The feature is similar to other popular short-form video apps like TikTok and Instagram Reels, and is designed to allow users to quickly and easily create and share engaging video content with their audience. Shorts can be discovered through a dedicated Shorts shelf on the YouTube mobile app homepage, and users can also find Shorts content through the search function.

When will YouTube Shorts be monetized?

As of February 1, 2023, YouTube has made it possible to start earning money on YouTube Shorts. Monetizing partners are now able to earn money from ads that are viewed between videos in the Shorts Feed on YouTube.

Six tips to make money on YouTube as a teen

1. Create an Adsense account 

AdSense is Google’s digital ad platform, often considered one of the most sophisticated on the internet. On YouTube, setting up AdSense is part of the overall YouTube Partner Program (YPP), which gives creators additional tools, support and monetization capabilities that the average YouTube user can’t access.

For kids under 18, a parent or guardian over 18 must sign up for the AdSense account through their own Google account. Once that AdSense account is approved, you’re good to connect the YouTube account of your choosing.

2. Apply for YouTube’s Partner Program

Assuming you meet YouTube’s “Minimum Eligibility Requirements,” you can apply for the YPP. For your application to be put into queue—typically a one-month turnaround time—your account will need to:

  • Meet subscribers and watch time thresholds—1,000 subscribers and 4,000 watch time hours over 12 months. 
  • Have no active Community Guidelines strikes. It’s a good idea to read and understand these thoroughly, as you’ll be measured against this behaviour expectation throughout your time on YouTube.
  • Sign the YouTube Partner Program terms. If you’re under the threshold, click “Notify me when I’m eligible” to get an email when you can connect your AdSense account. 
  • If you meet the thresholds, you can connect your AdSense account through YouTube Studio (found under your profile image, top right) and then click “Monetization” in the left menu to follow the steps to get to “Sign up for Google AdSense Card.”

Once you’re notified of your approval, you can set up ad preferences and turn on monetization on your uploads. 

A mom helping her kid make YouTube merch for subscribers

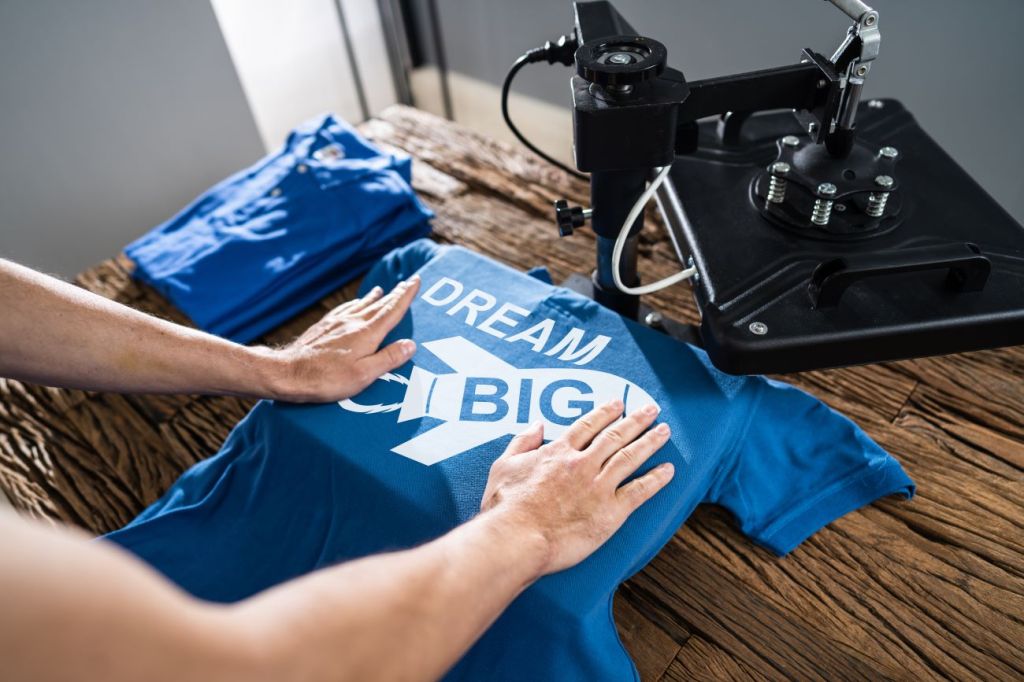
3. Sell your custom merch to superfans

Much like most bands make money on their tours and not from selling albums, most YouTubers profit more significantly from selling branded merchandise. “Merch” is a way many “Made for Kids” channels can earn revenue on their videos. For example, Canadian kids’ music channel Pancake Manor can’t show ads due to YouTube’s content guidelines, but they can sell likenesses of their famous puppet characters, Zach and Reggie, as dolls or on t-shirts

YouTube’s merch guidelines aren’t age-gated, but they mandate that “your channel’s audience is not set as Made for Kids, and your channel does not have a significant number of videos set as made for kids.” You must also have over 10,000 subscribers as part of YouTube’s eligibility guidelines. Many tweens and teens under the age of 18 work with a parent or guardian to set up alternate e-commerce sites, like Shopify, Etsy or RedBubble. Shopify even encourages YouTube creators to start building their merch line to grow their audience on YouTube. 

Fifteen-year-old actor and music artist, Gavin Magnus, offers a robust eCommerce store on Society Merch for his four million+ subscribers. While 19-year-old makeup vlogger, Avani Gregg, sells her merch on a platform called Fanjoy, an eCommerce site that focuses on helping popular video content creators monetize through merchandise offerings. 

RedBubble and Etsy are teeming with merch based on popular YouTubers. However, most of what is found there are unofficial designs created by fans rather than the content creators themselves. Should your YouTube fame rise, it’s worth noting that you’ll become a public figure and others may use your likeness to make money. 

4. Design a membership program

Should your channel reach a threshold of several thousand loyal, returning fans, you might start offering more exclusive content through paid memberships. While YouTube’s Membership guidelines state that you have to be over 18, Patreon allows anyone 13 and over to create membership accounts so that superfans can pay a monthly subscription fee and support your content creation efforts. However, Patreon strongly encourages minors to work with a parent or guardian to keep safe on their platform. 

Determine membership fees and tiers by deciding what is feasible for creating additional content exclusive to subscribers. Perhaps it’s behind-the-scenes content or your favourite tips or links. Some creators offer free downloads of printables in their area of expertise. Some might provide Cameo-style custom video greetings. Here’s where creators can get hyper-creative: Think about what your audience might want that only you can offer.

5. Create sponsored video content

Many video creators partner with brands to offer sneak peeks or details on a product release. To access YouTube’s influencer program—BrandConnect—which connects creators and brands easily through an exclusive marketplace, you must be 18. However, creators can also seek out their own brand partnerships, so long as they observe YouTube’s guidelines and fully disclose the relationship to their audiences

Start by creating a media kit. You can find free influencer media kit templates online or using online design software like Canva. Include a bio, images and synopsis of your most popular videos, statistics about your channel (typically subscriber count, watch time hours) and anything you know about your audience. The goal of the media kit is to tell a story about why a brand might want to work with you. Collaborate with a parent or guardian to decide what is appropriate to charge, such as for a full video about a product versus a small mention of a product. What will you charge if you’re asked to use or wear the product? It’s a good idea to truly like the product or service you’re asked to endorse since anything you suggest to your audience will reflect on your personal brand.

Not all sponsored content opportunities have to happen in exchange for money. You may find you’re offered one-of-a-kind experiences, like trips or behind-the-scenes access from brands that want to reach your audience. Decide how much work you want to put in, including how many revisions or edits your “client” will be able to suggest. How many posts would you be willing to create in exchange for what the sponsor brand asks for? Then design some packages that state your boundaries to add to your media kit. 

6. Licence your video content 

Now that you’ve created all this video content, you can amortize it through other channels. A video interview series can also become an audio podcast, for example. If you can build enough traffic on a website (yours or a partner’s website), you can embed your YouTube links into other content to increase views and ad dollars. 

You can also sell your content to publishers that will pay for it. Everyone is looking for more content and new voices. If you’ve got a unique cooking channel, reach out to publishers and brands that have audiences around food. Some bloggers may have large niche website audiences but no YouTube presence. Offer them a package of videos and negotiate the ad revenue split. 

List your videos on marketplaces such as Jukin Media, which acts as an agency that gets your content seen on major partner websites and splits the revenue. If your channel focuses on travel or beauty, do you have clips that could work as stock footage on Pond5, Shutterstock, or Wirestock? In most cases, it’s best to work with an adult or guardian to ensure your effort is worth the return on your time and protects both you and your intellectual property. 

Read more: 5 ways to encourage your kid to start their own business.

A young teenage girl vlogging for her YouTube channel about thrifting and fashion

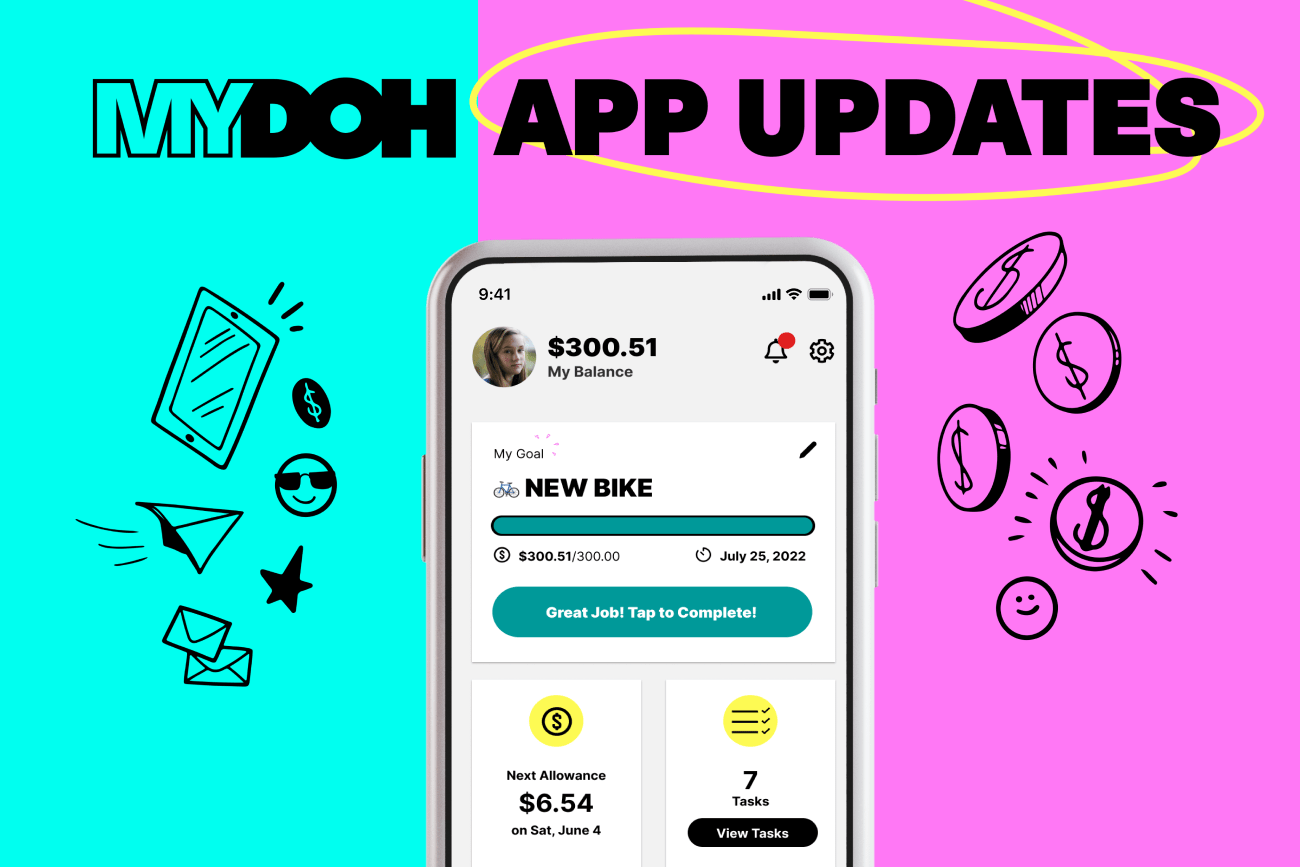
How Mydoh can help entrepreneurial kids build financial smarts

Now that you know everything there is to know about making money through YouTube, thinking about the details can help you (or your child) start to build success there. An important first step is for your child to learn to set a budget as part of running their own online business. Review video production nice-to-haves versus must-haves and get them thinking about how much they’ll have to earn to support their vlogging. 

If that high-end DSLR camera is a must-have, it’s time to start thinking about how to make that a reality. Earning money by doing chores benefits the whole household, while teaching kids about the value of money. Mydoh is a money management app for parents and kids. With a Mydoh Smart Cash Card, you and your child can track their earning and spending history. Designed so parents can set weekly or one-off tasks, with Mydoh simplifying transactions by automatically transferring money from your account into your child’s Mydoh account once tasks are complete. 

Future video stars can also start learning how to spend their hard-earned money wisely through our app.

Take the first step towards teaching your kids valuable money and entrepreneurial skills – Download Mydoh now!

How to Choose a Driving School in Canada

The teen years are a time of big milestones and increasing independence. If you ask most teens, they’re likely to say it’s a driver’s licence that signals the greatest freedom. The minute a teen passes the beginner’s driver test, they’re raring to go. For parents, many can still remember how it felt when that day came for us. 

While this enthusiasm can make the process exciting, it’s important for teens to be aware of the responsibility that comes with having a driver’s licence and operating a car. Why? It’s estimated that ninety per cent of traffic accidents are caused by human error or road conditions. 

So, if your teen is ready to think about getting behind the wheel, now might be a good time to pump the brakes, research and discuss the benefits of learning how to drive from an accredited driving school. 

Here is some of the key information parents and teens will find helpful when it comes time to choose a driving school in Canada. 

What are the benefits of driving schools and drivers ed? 

If you’re a parent who has thought about skipping driving school and teaching your kid yourself, it’s worth considering the implications, both from a safety and relationship viewpoint (because teaching your kid to drive can be very stressful). While practising together is helpful, it may become clear that using a driver education course is a better option. 

Here are some of the benefits of attending a driving school vs DIY: 

  • Driving schools offer a professional instructor with the neutrality to manage an emotionally-charged teen driver and the skills to convey the necessary driving knowledge your teen will need to be a safe driver. 
  • Driving lessons help teach the specific skills your teen will be required to perform when they take their road test. 
  • They have the right equipment in their car (a.k.a. the extra brake!)
  • When learning from an instructor, your teen is more likely to take feedback and listen, as opposed to tuning out parents.
  • Testimonials, video and instructional tools provided in formal driving school programs help to convey the seriousness and responsibility that is required of new drivers.
  • It can be time consuming for busy parents to fit in consistent lessons, which could mean either a prolonged teaching process and inconsistent gaps between lessons.
  • Students who are enrolled with a driver’s ed program may have an advantage of being able to take their road test sooner (For example, it’s eight months in Ontario versus 12 months if the teen is not registered with a school). 
  • Perhaps most importantly (whether we want to admit it or not) your teen is less likely to pick up bad driving habits when learning from a pro. 

Does driver’s ed help lower insurance?

When your teen takes driving lessons through an accredited drivers education school, most insurance companies should provide a 10 to 25 per cent discounted rate. This is a great way to reduce your new driver’s premiums and help them to budget for the cost of having access to a car—especially if your teen plans to buy their own car

A driver’s ed program also increases the likelihood of them becoming a safer driver, making a teen much less likely to get into an accident and have to make an insurance claim. Once your teen completes their driver’s ed program, they’ll receive an official certificate to be shared with insurance providers. 

Read more about Insurance 101 for parents and kids

How to choose a driving school

Depending on where you live, there can be an overwhelming number of options when it comes to choosing the best driving school for your teen. Here are some of the important details to look for in a driving school:

Confirm the program is accredited

The first priority is to ensure the driver’s ed program is accredited in your province/territory. Check that the school is on the approved list and does not appear on the revoked schools list. 

Compare prices

Second, compare pricing as well as the different packages offered. Some schools offer in-class and in-car lesson packages, while others offer flexible/virtual modules followed by in-car lessons. If you are thinking about signing your teen up for additional, specialized classes, such as winter or highway driving, it is a good idea to choose a school that offers them. 

Learning environment

Next, look at the class size and set-up. Does your teen learn best in smaller, individualized classes? Can they cope with online classes/modules or would they do better if they took the classes in-person? Does the school offer a pre-road test review lesson and/or allow use of the lesson car for the road test? 

Flexibility

Scheduling can be an issue for busy families. If your teen has a lot of commitments, it may require you to look for a driver’s ed program that can pick students up at their school or offer weekend lessons if your teen has after school activities. 

Ask for recommendations

Of course, word-of-mouth is a powerful tool for parents and it is likely you know other families who have recently been through this process. Get recommendations and referrals from other parents. Ask about their experiences and whether their teen felt well-prepared for their road test. Check online reviews for any red flags, which include schools that charge extra fees or ask for payments in cash to avoid tax. 

How much does it cost for a driving school in Canada?

The average cost of an MTO approved driving school program is $600 (based on Ontario fees). However, there are different packages available and pricing will depend on where you live. Basic packages teach drivers the necessary techniques for taking a road test, while other packages include a rental of the test car and/or an additional pre-test lesson. The advantage of the pricier package price is that your teen will be familiar with the vehicle. 

Parents can also explore additional in-car lessons for driver’s that would benefit from the extra teaching, as well as specific lessons in defensive or winter driving

If a more advanced road test is required to allow your teen to drive on highways (as required in some provinces/territories), lessons can also be purchased as an add-on. The cost depends on how many lessons are included in the package. 

How many lessons does a new driver need?

Beginner Driver Education courses typically (depending on the province/territory) include up to 20 hours of classroom instruction, either digitally or in-person, plus a minimum of 10-hours of in-vehicle training with a licensed instructor. Drivers must complete their in-vehicle training within one year of starting classroom instruction. Once the course is successfully completed, the driving school certifies the driver online and your teen’s student driver record will be updated through the Ministry of Transportation. It is also possible to request a copy of your teen’s Driver’s Licence History for a fee. 

Another advantage of driver’s ed is that drivers who attend accredited driving schools are allowed to complete their road tests sooner than those who do not attend a school (and who may have to wait up to 12 months). 

Drivers training tips for parents teaching their kids to drive

A common question is whether or not teens can learn to drive with parents. Parents can be a great help for kids who are learning to drive, helping to reinforce what teens are learning in drivers ed classes and in-car lessons. 

Here are some tips for knowing how best to support your teen’s driving lessons:

  • Check in with the driving instructor to find out which skills your teen needs to work on between lessons.
  • Talk to teens about the responsibility of driving a car and set up expectations. Teach them about general maintenance like washer fluid, tire pressure, and pumping gas.
  • Take them driving. Start with familiar routes that they have travelled often and let them take the wheel when you are headed out on errands. Stick to daytime hours and clear weather days until they are much more experienced (it’s important to note that learners permits, such as a G1 license in Ontario, restricts novice drivers from driving on major highways without an accredited instructor). 
  • Take a really deep breath before getting in the car and remember they are learning and will need a lot of patience and calm. A treat at the end of a practice session can help to sweeten the process for both of you.
  • Believe it or not, you might find yourself sharpening your own driving skills as you practise with your teen. Embrace the time together as a shared learning experience.

The most important thing when it comes to teens learning how to drive a car, is awareness of responsibility. While a driver’s ed program and parental influence can help to instill this in teens, they can be even more mindful of the responsibilities of driving if they contribute to the cost of the driving lessons. 

By using the Mydoh app, teens can earn money and keep track of their savings, spending, and help them set a big goal—like a car of their own! Once they achieve their driver’s licence, the Mydoh app can continue to keep them on track for budgeting the cost of driving and maintaining a car. 

Download the Mydoh app to help your tweens and teens gain real-life experience managing their money. 

How to Make a Resume for Teens With Examples

You’ve scoured the job postings, picked the best of the bunch, and now it’s “game on” for getting hired. But before hitting “apply,” the first step is to learn how to make a resume for teens. It’s an ultra-important document that makes the first impression on your employer, and it’s your ticket for putting your best foot forward.

From advice about what to include (or exclude!) to writing a resume with no work experience to resume examples for teens, we’ve got the scoop on how to write a resume.

View our favourite Resume Examples for Teens.

What is a resume?

A resume is a formal written document that outlines your qualifications, such as your education, skills, work experience, and any notable accomplishments.

“The purpose of a resume is to showcase your skills and experience and to convince a prospective employer that it is worth calling you in for a job interview,” says Sabrina McTaggart, a career coach for young adults based in Ottawa, Ontario.

Most employers require a resume to apply for a job and it’s typically two pages maximum. It’s often accompanied by a cover letter—a one-page letter of introduction that summarizes why you’re applying for the job and what makes you an ideal candidate. 

Learn more about Best Summer Jobs for Teens in Canada

What should be on a resume for a teenager?

A resume is your chance to shine to a prospective employer. But avoid listing all things you’ve ever accomplished in your life. Here’s what should make the cut:

1. Your contact information

Your contact information should be front and centre. Specifically, the heading at the top of the first page should contain your name, address, email address, website, LinkedIn URL, and phone number.

Tip: Now is the time to create a professional email address. MrSlamDunk5001@gmail.com is appropriate for corresponding with your peeps, but not with hiring managers. It doesn’t have to be complicated: you can use your name (Jamie.Doe@gmail.com) or create a generic address (hire.jamie@gmail.com). 

2. Summary/objective

Consider this section to be the “Coles Notes” version of your entire resume. Write a bullet-point listicle that rounds up the reasons why you’re the prime candidate for the job: from your educational achievements to your mad computer skills to awards and accolades. For example:

  • Entering fourth year of secondary school studies at Pleasantville High School.
  • Five years of experience caregiving for children.
  • Proficiency in Word, Adobe, and Excel software.
  • First Aid and CPR Certified.
  • Strong attention to detail, superior organizational and project management skills.
  • Familiar with social media.
  • Hold a valid Ontario driver’s licence.
Teen girl looking after boy drawing with chalk

3. Relevant experience

This section should be a snapshot of past and present experiences that demonstrate your ability to do the job. 

You should include:

  • Job or position title
  • Name of employer or organization
  • Dates of employment or participation
  • A summary of responsibilities and accomplishments (written as a bullet point list is acceptable).

“Briefly outline your relevant work experience and volunteer experience and what skills you developed in that work,” says McTaggart. “You can add any relevant extracurriculars that might make you a more attractive candidate, such as athletic accomplishments or music competitions.”

It’s standard to list your experiences in reverse chronological order (e.g., start with the most recent and work backwards) and only include what’s relevant and recent. A laundry list of everything you’ve ever done is TMI. Instead, highlight unique or noteworthy experiences that demonstrate your ability to handle the job. 

Tip: Show, don’t tell. You may have been elected to the student council (e.g., “Student Council Treasurer 2022-2023”), but it’s more impressive to share what you accomplished in that position (e.g., “Managed the council’s annual budget of $25,000 and fundraised an additional $10,000 to kickstart a Gender and Sexuality Alliance Network at school”).

Learn more: 14 best part-time jobs for teens.

What to put on a resume with no experience

’If you’ve never had a job, think outside the box. Did you house sit for your neighbour? Do you coach your younger sibling’s soccer team? Did you volunteer for a beach clean-up last summer? A hiring manager is looking to see examples of when you’ve acted responsibly, which could translate to on-the-job cred.

“Employers are aware that teens often have little formal work experience when they are hiring for student jobs and entry-level positions,” says McTaggart. “Consider how you might demonstrate that you have some useful skills, such as organizing, planning, writing, communication, and a strong work ethic.” She suggests including skills you learned while doing chores for neighbours and relatives, babysitting, dog-walking, or tutoring peers in school.

4. Education

List any past, current, and future educational achievements in reverse chronological order (most recent first and work backwards). This should be the shortest section on your resume and include: 

  • The name of your school(s)
  • Any diploma/degree in progress or attained
  • Major/field of study
  • Enrollment dates
  • Expected graduation date
  • GPA (if above 3.5)
  • Any notable awards

If you’ve just graduated, list your high school, and if applicable, any post-secondary institution that you will attend next year.

If you’re still a student with limited job experience, you can put this section at the top of your resume. But if you’ve graduated and have ample work experience under your belt, your education is slightly less important and can be parked near the bottom.

Tip: “Include details about your education, including any awards such as Honour Roll or Dean’s List,” says McTaggart. Just keep it short and simple: “Graduated third in a class of 200 students, with a GPA of 3.8.”

Teenage boy sitting at computer screen coding

5. Relevant skills

Showcase personal and professional skills that are relevant to the position and give concrete examples. For instance, if you’re applying to a summer camp, spelling out that you’re “First Aid and CPR certified” may give you a leg up over other candidates. If driving is an essential part of the job, mention that you have a valid driver’s licence (as well as list the licence class and how long you’ve held it). 

This is also the place to park any computer skills; fluency in languages; and certifications, licences, or professional courses that you’ve completed (or are currently completing). 

“Are you proficient with any software?” asks McTaggart. “Be sure to note, for example, if you can use document, spreadsheet or presentation software, and especially if you have any experience coding at any level.” 

Possible skills could include:

  • Customer service
  • French language
  • Organized
  • Creative
  • Research
  • First aid
  • Basic coding
  • Video editing
  • Photography
  • Social media
  • Communication skills
  • Microsoft Office
  • Leadership
  • Fundraising
  • Valid drivers licence

To understand what skills to include, study the job description. Does the position require using a computer? Are you handling cash? Will you be communicating with customers? Read between the lines and pick out the most important competencies for the job.

“For example, if you volunteered to help seniors with their technology in a retirement home, you have demonstrated strong communication skills, patience, and reliability,” says McTaggart.

Tip: Resist the urge to embellish your skills. Hiring managers often do background checks to confirm details. They may even request a copy of your purported credentials.

Read more: Job interview questions for teens with sample answers.

6. Awards and achievements

This is your chance to humblebrag about your awesomeness! List any scholarships, bursaries, awards, or achievements. These could be through school, the community, or extracurricular activities. If you’re applying for your first job, these seemingly small achievements can help your resume sparkle above the rest. 

7. References (optional)

While not mandatory, you can list up to three professional contacts who can speak to your character and/or professional experience. Always ask before listing a potential reference on your resume. No one likes surprises, and a courtesy “heads up” gives the person time to think about what to say. 

Learn more about How to prepare for your first job interview

Teen girl working at deli counter hands ticket to woman

Tips for writing a resume for teens

  • Stick to one to two pages: If you exceed that length, you risk overloading the hiring manager with information. Less is more!
  • Make a professional email address: “Avoid things like hunnybunny@hotmail,” says McTaggart.
  • Make your resume visually appealing: “This does not mean getting fancy,” says McTaggart. “It simply means making good use of white space and avoiding dense blocks of text.” Also, be consistent with fonts and formatting.
  • Keep it simple: A resume should be eye-catching but not gaudy. “Unless you are applying for a role where a lot of creativity is required, it is advisable to avoid flashy colours and fonts,” says McTaggart. “The key to a good resume is to make it readable and professional.”
  • Think about what the employer wants: Then, customize your resume to fit those qualifications. “Put yourself in the shoes of your prospective employer: they want a teen who is reliable, punctual, has a good attitude, can follow instructions and communicate clearly,” says McTaggart.
  • Study the job posting: It gives clues about what the employer wants in a job candidate, as well as keywords to include in your resume. It might also give intel on possible interview questions.
  • Prove you’re a leader: “Leadership skills are highly regarded by employers,” says McTaggart. “If you have ever been captain of a team, coached the younger members of your basketball club or taken a leadership role in your school play, be sure to highlight this.
  • Use “action” words to paint a picture. Use descriptive language to leverage your skills and experience, as well as what you’ve achieved. Instead of simply saying you “did a thing,” consider if you could use these verbs such as led, researched, created, managed, delivered, resolved, founded, developed, tracked, collaborated, grew, or promoted. The thesaurus is your BFF!
  • Proofread: Your resume should be squeaky-clean before you hit send. Run a spelling and grammar check—ideally, twice. Read the resume out loud to catch any awkward sentences or to trim length. Get a friend or family member to proofread for typos too.
  • Ready your references: “If you have done good work for someone, even if informally like babysitting or snow shovelling, consider asking them for a letter of reference,” says McTaggart. “You can then list these folks under your ‘References’ section.” She also recommends making the request in person and routinely after you finish a job. While few people do this, it’s a good habit that can pay off later.
  • Minimize your digital footprint: Hiring managers typically do online searches for job candidates. If you’ve got a digital presence that you’d rather not share with a potential boss, switch your social media settings to private. 

Tip: Include a cover letter with your resume. Learn more about how to write a cover letter for students.

Resume Examples for Teens

Need some help crafting your perfect resume? We’ve got you! Here are some resume template for teens that can help:

Resume with no work experience for teens

A sample resume for a high school student with no job experience:

Resume with work experience for teens

A sample resume for a first-year university student with job experience:

Last word about how to make a resume for teens

If you’ve made it this far, you should be well-equipped to take on the task of creating a resume. Start by studying the job description and brainstorming what skills and experiences might be highly valued by the hiring manager. Using these pro tips, draft a resume that showcases your skills and uses concrete examples that are directly relevant to the position. Remember to have a friend or family member proofread it before you hit send.

One last piece of advice: avoid the pressure to be perfect. At this age and stage, no one expects you to have a jam-packed resume with fancy awards and job experience. Avoid “padding” your resume with complicated or overblown achievements.

“As a teen, you’re not applying for Senior Vice President roles!” says McTaggart. “Keep it simple.”

Download the Mydoh app to help your tweens and teens gain real-life experience managing their money. 

Introducing the Mydoh Goals App Feature

Your child’s first experience with saving money was probably dropping coins into a piggy bank. Learning to save money for a specific goal can give kids a sense of accomplishment and is an important part of financial literacy. To make it even easier for kids and teens to save for that big-ticket item, we added a brand new feature, Mydoh Goals, to our app. 

Read on to learn more about how Mydoh Goals can help kids save for the things they want or need! 

How Mydoh Goals help kids and teens save 

Having the independence to buy the things you want (like a slice of pepperoni pizza or bubble tea) helps kids develop real-world money skills. But, it’s easy to spend impulsively without thinking. Mydoh Goals can help kids and teens visualize longer-term goals, such as saving up for a new computer or bike. By setting a goal, kids have a tangible reason to fight instant gratification and save for something important to them. 

As kids earn and save, they can watch their total balance accrue and see how small spending and earning choices can help them reach their goals. Our new Goals feature is also an opportunity for parents to talk to kids and teens about setting SMART goals or their own experiences saving for the future—like putting away money to  travel as part of a gap year or for your first car

How to use Mydoh Goals

Here’s how your kids can save towards their financial goals in the Mydoh app:

Set a goal

Kids and teens can set a goal by choosing the name of their goal and adding an emoji, the category (e.g. trips, electronics, clothing), enter the goal amount, then set a target date to achieve this goal. The Goals feature means kids can set one goal and their overall wallet balance will count towards their goal. 

Visually track their progress

Kids can track their progress towards their goal against their current total balance. As their wallet balance counts towards their goal, they’ll be able to track progress whenever there is a change in their balance (like every pay day!). 

Celebrate!

When your kids achieve their goal, they’ll receive a celebratory message in the app. This helps reinforce goal-oriented saving and encourages kids to have real-life conversations with their parents about their achievement. 

As with other Mydoh features, parents will have visibility of their child’s goal and their progress towards reaching it. 

Mydoh wants to hear from you!

Stay tuned for more exciting updates and product features that make it even easier for you to teach your kids about financial literacy. Meanwhile, please contact us by email at hello@mydoh.ca or in-app with your suggestions. We’re listening! We work hard to study all your feedback and transform it into safe and secure features that help you raise money-smart kids. 

Download Mydoh to help your kids and teens gain real-life experience managing their money. 

Life Skills to Teach Kids with Disabilities

Mastering life skills is essential for kids as they grow from children into independent adults. For caregivers of kids with disabilities, teaching life skills also includes a critical focus on personal safety. 

As the parent of a child with developmental disabilities, teaching her life skills looks slightly different than the approach taken with my neurotypical teen. He still chuckles at my “Safety first!” battle cry. He may have a solid handle on life skills, but for my daughter, safety is always top of mind in everything we do because… safety first. See? It’s always top of mind.

Here are some essential life skills that parents can teach kids with disabilities in a way that will promote independence and help keep them safe. 

What are life skills?

Life skills are described as any of the skills necessary to deal effectively with the challenges of life. Broad categories include social, emotional and cognitive skills. These can be broken down into everyday activities like riding the bus, ordering a pizza or taking a shower. Mastering basic life skills may determine the level of independence a child will experience in adulthood—regardless of whether or not your child has a disability. 

Challenges caregivers of kids with a disability might face

Setting your kids free out into the world can be anxiety inducing for any parent. Just thinking about my daughter at the mall on her own makes my palms sweat. For caregivers of tweens and teens with developmental disabilities, there is an added concern about vulnerability. According to a Toronto Star article, based on data from Statistics Canada, “Canadians with disabilities are about twice as likely to experience violence as their able-bodied peers, with greater instances of victimization taking place at every stage of life.”

Kids with developmental disabilities are often more naive than their typical peers which can land them in vulnerable situations. Confusion around social cues and challenges with communication can also make threats to personal safety more prevalent. 

Caregivers are not only tasked with teaching life skills to promote independence, they must also make sure kids are protected from accidental or intentional harm. 

Three life skills you can teach kids with disabilities 

1. Self-care  

Teaching skills like bathing, dental hygiene, or taking daily meds, should also include safety strategies. My daughter has epilepsy, so when she needs to bathe,  a caregiver must remain close by in case of  seizure. Obviously, you can’t control when and where a child has a seizure, or might slip and fall, so a safety plan is necessary. But, there are specifics parents or caregivers  can teach in terms of safe and effective self-care. 

For example, we can teach children to count out their own medications with appropriate supervision. This helps allow kids to go through the process so they have accountability over their own health. 

When teaching self-care routines, like showering for example, use specific language and break down each task, if needed. Demonstrate what an appropriate dollop of shampoo looks like and explain or demonstrate the physical mechanics of scrubbing your scalp. “Wash your hair” doesn’t implicitly imply rinsing out the suds afterwards. I learned this firsthand. Model how to check that the water is a safe temperature before stepping into the shower. Repeat until you are confident your child understands and is able to perform the task.   

2. Household tasks 

Skills like cooking, cleaning, and laundry can be taught by way of chores around the house. However, there can be potential safety pitfalls in many household chores. A hot stove, cleaning solvents, and sharp knives could almost make parents want to just do it themselves (myself, included!). However, doing it for my child isn’t going to inch her any closer to independence. So, I grit my teeth and take a step back. 

When it comes to household tasks, start by modelling proper technique, then give kids a turn. Since these tasks are often multi-step endeavours, it’s important to break them down into manageable steps.  As a task becomes easier, allow your child to attempt it with less assistance or reduced supervision. The goal is for kids to eventually perform the task independently while you merely check in. This “show then try” strategy helps set kids up for success without compromising safety. 

Read more about household chores for kids with disabilities.

3. Communication 

Here’s how to teach kids with disabilities communication skills online, at home, and in their community.

Online and at home

Allowing the “outside world in” could put kids with intellectual disabilities at risk. Caregivers should model how to send and receive emails or texts and how to answer the phone or door appropriately, while maintaining boundaries and online privacy. Let kids explore the internet, but ensure online safety settings are in place. Having a computer in a common area is one way to monitor online activity. 

Learn more about how to set social media boundaries for kids and teens

In the community

Teach kids to identify helpers in public settings they can go to and demonstrate how to ask for help if they are lost or confused. Model the greetings and pleasantries we use with others in the community. For example, practise saying, “Hello, how are you today?” And “I’m just looking, thanks” as they enter a store. Help kids practise ordering from a menu or asking for assistance in locating an item at the grocery store. 

Give kids plenty of opportunities to practise these communication skills in public. You can assist by providing them with “business card” style notes to carry and pass to a store clerk. The card might say something like, “Hello! I have a speech disorder and developmental disabilities. I am learning to communicate my needs. Please be patient with me as I practise this skill.” 

How to teach life skills  

First, choose a skill to model. Show what it looks and sounds like. Break it down into steps to practise together. Then encourage independent attempts. Observe and offer suggestions or make corrections if necessary. Then repeat. Then repeat again. And again. Practice makes perfect as they say. Except, perfection isn’t actually the goal. 

Make it fun and reassure kids that mistakes are okay. Integrate changes slowly, be supportive, and celebrate the small wins. 

Build time management into these lessons. Visual schedules and timers can help maintain focus. Creating a “first this, then that” plan also helps keep kids on track. For example, “First I put my clothes away, then I can watch TV.” 

Tips on promoting independence in kids with disabilities 

Offer real-world opportunities for independence. While practising, engage a “secret shopper” (like a family member or trusted friend) to keep watch. For example, send your child into the store alone to grab a few grocery items, but arrange for an adult friend to be in the store at the same time. They needn’t assist, but they will be there if your child should run into a snag. Though not technically, “on their own” your child is more likely to have the feeling of completing a task independently. And that’s a pretty exhilarating feeling indeed. 

Recently I sent my daughter into her orthodontist appointment on her own. She entered the office while I watched from the car. She checked in and navigated the entire experience without any help from me. When I saw her return to the reception area, I went inside to book her next appointment. When she noticed me she said, “Mom, I’ve got this,” and sent me back outside. She booked her next appointment herself and had them write it on a slip of paper. When she got into the car she was beaming and said, “Mom, I did it all by myself!” 

Slow, steady, safe

My daughter may not master all the life skills my son or her typical peers will. However, we will continue to provide her with the tools she needs to keep on practising. A medical alert bracelet and a tracking device on her phone or smartwatch will help keep her safer. And, apps like Mydoh helps give her the independence to pay for items when she’s out honing her shopping skills. Which reminds me, we’re out of cereal. 

Download Mydoh and help build the foundation of financial literacy for your kids and teenagers.